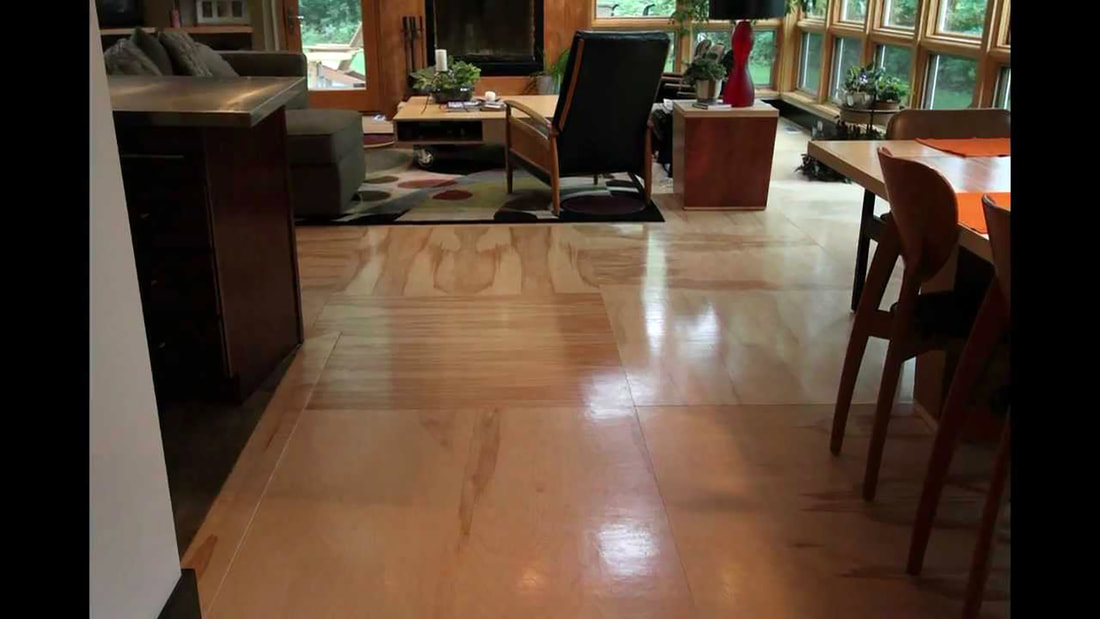
 CREDIT: Michael Huber Architects You can use softwood plywood to create a finished floor surface. Depending on timber prices, this material can be less expensive than other products such as pre-made timber planks which are specifically made as flooring products. I used plywood in a bedroom and would do it again in other rooms. I wouldn’t install it in a hallway or anywhere with heavy traffic or heavy items being dropped as it will ding and dent. 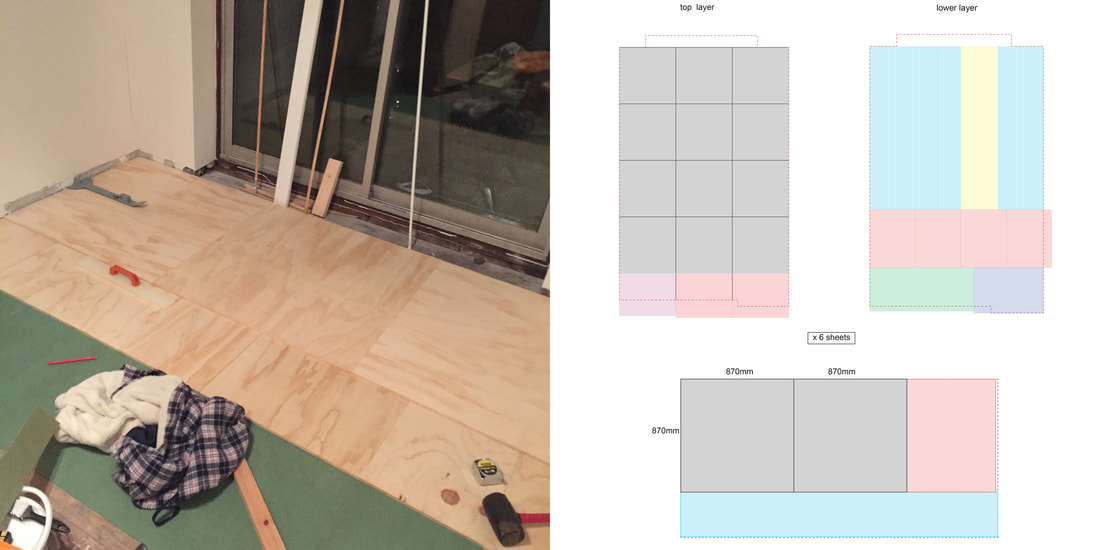 CREDIT: Amanda Moore, installing hardboard insulation, working out the cutting list I started with the subfloor of my 1950s house. You might have a concrete subfloor. I laid a hardboard layer, (the green material), which provides a little insulation, evens out any raised planks to make a flatter surface and is air permeable as I didn’t want to create any condensation issues around my existing subfloor. I removed the skirting boards as the new floor would be higher than the existing laminate which was there. I bought standard 18mm plywood from my local DIY shop which comes in 2440mm x 1220mm standard size. I did a cutting list to try and fit all of the pieces I needed on as few sheets as possible. I wanted squares as the final finish with the grain running in alternate directions and so I divided the width of the room by 3 for the typical square dimension, allowing a few millimetres gap between each plank and 10mm against the wall all the way round. The squares, when laid out onto a sheet of ply, left lots of odd offcuts and so I used CAD software to lay them out as a layer beneath the squares. The squares would be fixed to them to make a more rigid floor a total of 36mm thick. 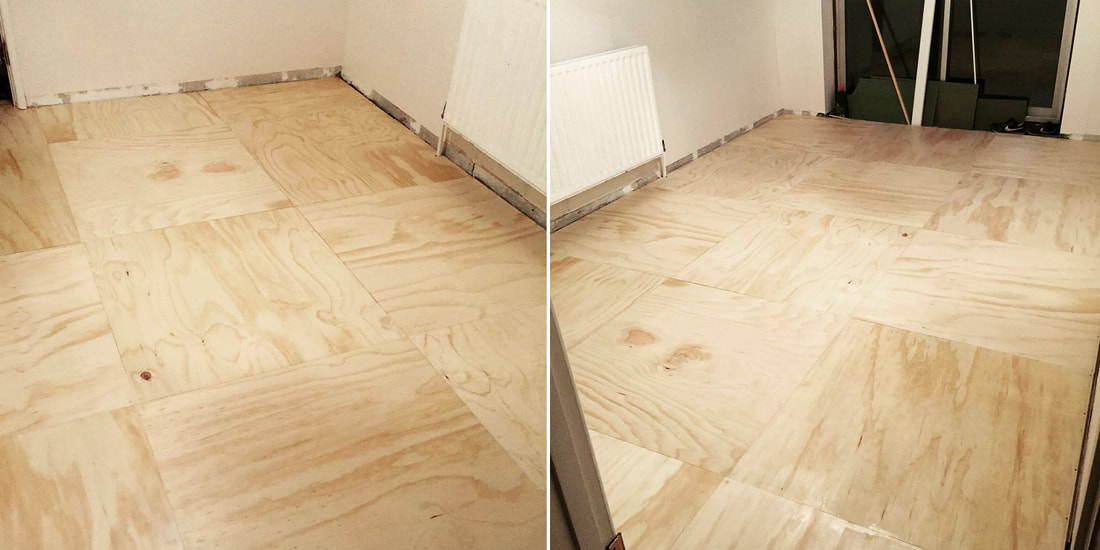 CREDIT: Amanda Moore, floor installed and screw holes filled The small pieces of plywood when cut easily stacked into my car. I countersunk holes in each corner of the top layer of squares and screwed them to the layer below. They were also fully glued and I applied wood glue with a big brush. So essentially, the ply floor is not fixed to the subfloor, it’s a big rigid floor made up of 2 layers of ply sitting on the hardboard layer. The wood tended to have a nice side and then a not so nice side, (knot so nice side), which I laid to the bottom. I then used a high-quality yacht varnish with a satin finish to lacquer the floor, after filling the holes with wood filler in a light colour to match. 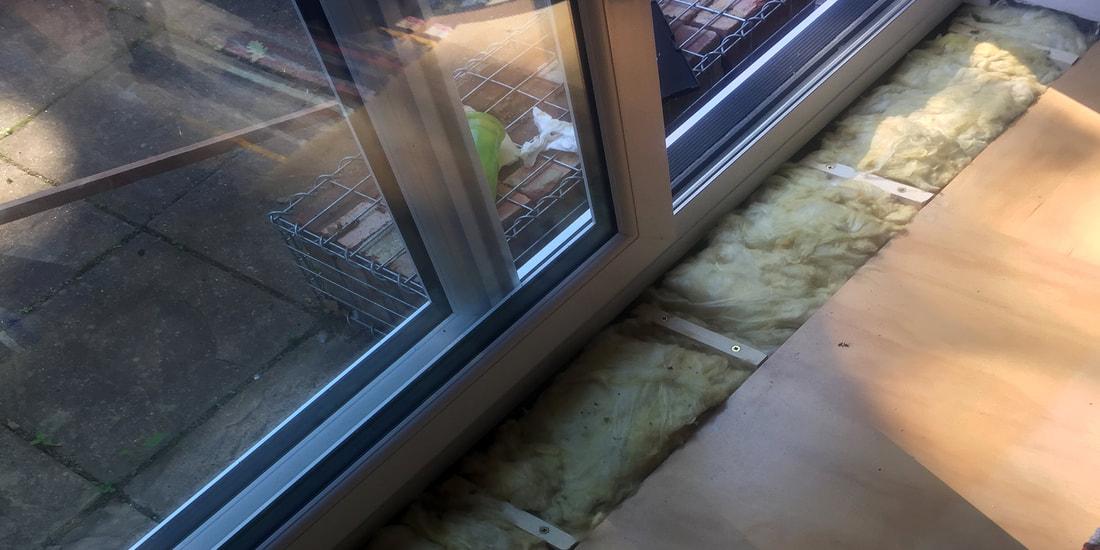 CREDIT: Amanda Moore, installing mineral wool and supports for cill 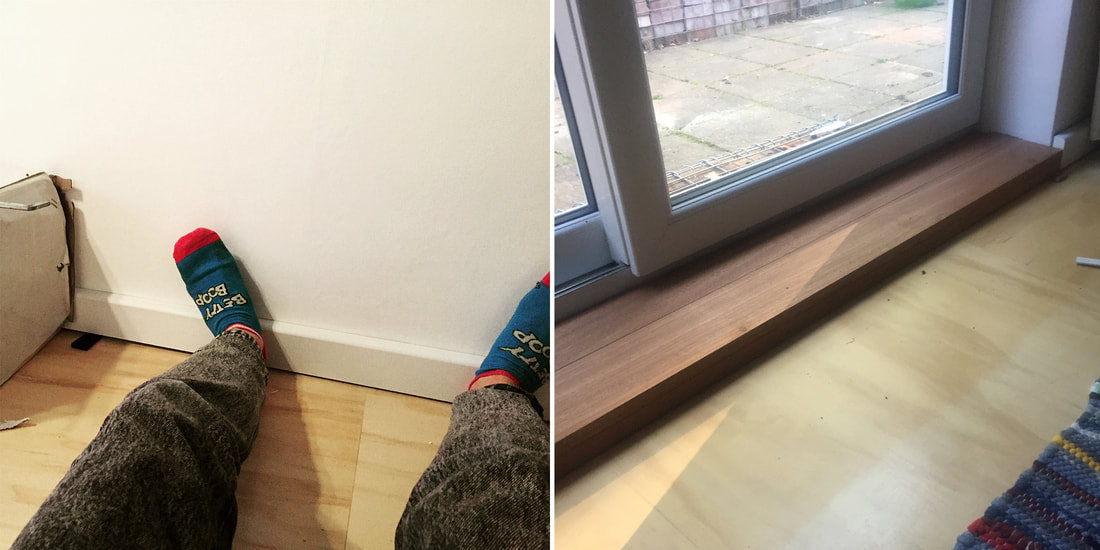 CREDIT: Amanda Moore, fitting the skirting and cill I bought high density fibreboard skirting which was pre-primed. The hardest part was cutting 45 degree mitre cuts for the corners. The adhesive was applied with a caulking gun and I pressed it against the wall with my feet!
There was a gap left against the sliding door. I added support battens and mineral insulation and then made a cill from Red Sapele timber. I’ve built an oak parquet floor in another room which I’ll put in another blog post and the price comparison is very different. The oak ran me £40 per square metre plus glue and hardboard whereas the ply cost around £10 per square metre but per layer, so £20 per square metre and I got away with cheaper glue than the carpenter’s glue I needed for the oak. The whole thing was also done in a day. It's a pretty simple way to make an attractive floor.
0 Comments
 CREDIT: Richard Chivers. Gosport Mural, Amanda Moore 2022 Over the last two years I’ve been creating more public artwork using vinyl printing rather than hand paint or applying art traditionally. The process goes like this…design an artwork which is site-specific for the client, (usually local authority), approach a vinyl printing company to survey the site accurately and quote for the work, have them print and install the final work like outdoor wallpaper. I’ve used adhesive wraps for three types of installation:
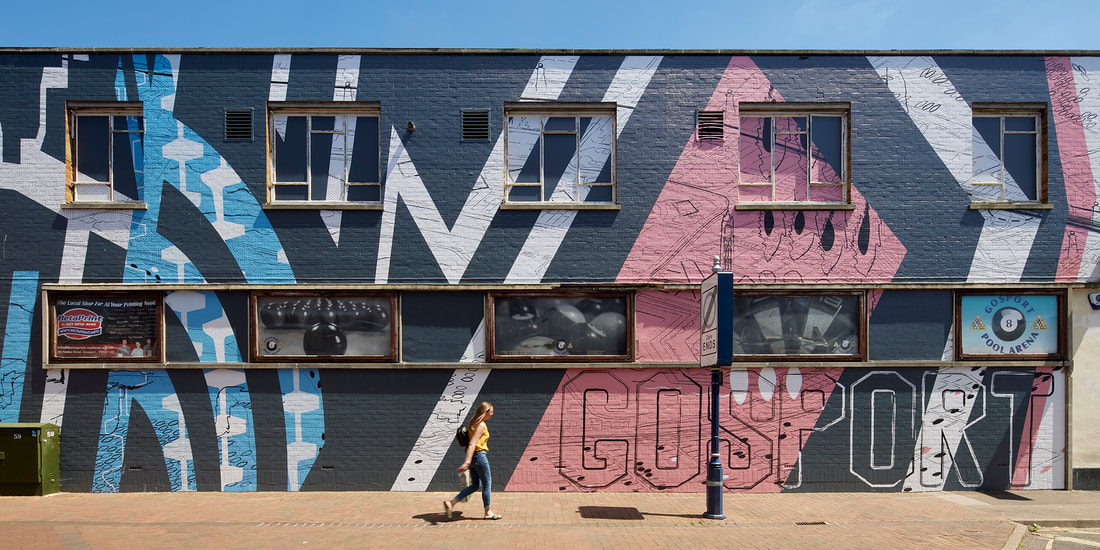
The advantage of using a vinyl printing subcontractor is speed. I tend to mock up artwork using Adobe Illustrator mostly using vector-based lines and shapes which cuts out concerns over image resolution. I then approach a subcontractor I’ve worked with previously and ask them to measure on site and quote for the work, plus provide a method statement detailing how they will install safely and any product warranties. I’ll often have a sample installed on the site so that we can see how the material will stretch over textures such as brickwork and how easily it is removed. 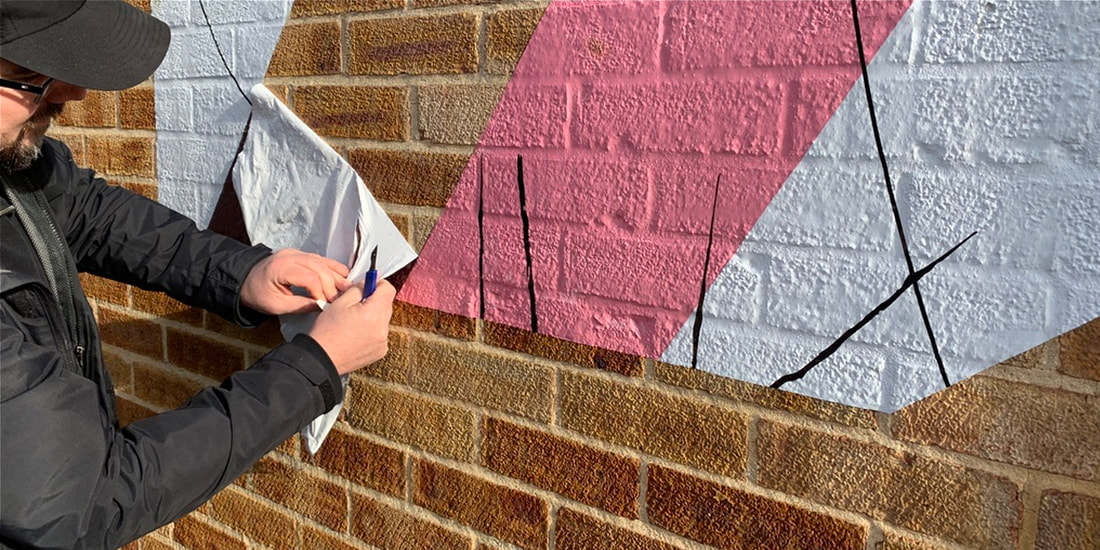 CREDIT: Amanda Moore. Testing vinyl wrap. The project I worked on in collaboration with Studio BAD in Gosport in 2022 involved designing a wrap for a snooker hall building as part of a trail of new art within the town centre. I designed a mural which picked up on Goport’s naval heritage by taking dazzle boat painting patterns and combined this with colours and motifs seen on heritage buildings around the town. All of this was drawn in Adobe Illustrator and sent to Mac Signs based in Southampton who installed the work using a scaffold tower within a week, although this week of labour was spread out around poor weather. 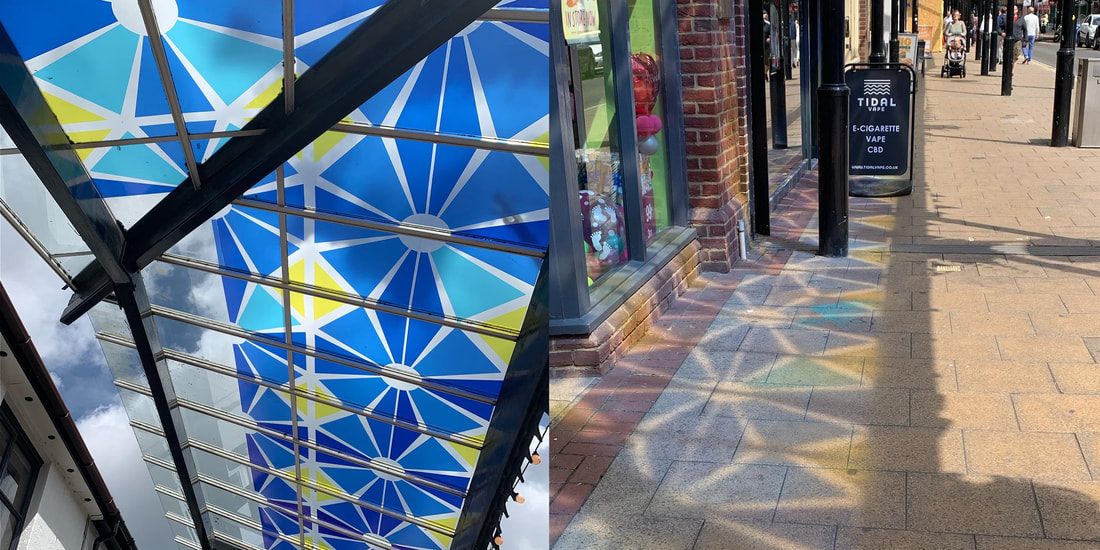 CREDIT: Amanda Moore. Eastleigh translucent vinyls In Eastleigh I designed a large set of translucent vinyls which were based on Art Deco patterns seen on an early twentieth century building in the town. These were installed to glazed colonnades and create reflections onto the ground. The prints were cut around the unevenly spaced mullions on site rather than needing to measure each piece of glass. The works were installed to the underside around the town, bird poop not landing on top.  CREDIT: Richard Chivers. Southampton Guildhall urban rug. For Southampton’s Guildhall Square an urban rug was formed using coloured squares made from recyclable aluminium. These squares were arranged as pixels forming architectural motifs on the Guildhall building. The texture for floor art is important in terms of guaranteed slip resistance in public areas. These didn’t quite hold up as well with the local skateboarders and they tore at the edges but it worked well as a temporary installation.
 CREDIT: Alamy Stock Photo, Office Space 1999 Whilst working in the construction industry as an architect, I always had an additional side-income as a freelance artist. This meant that I had the comfort of a full-time income whilst gaining experience in applying for freelance commissions, winning them, carrying out the work independently and doing my own billing and accounts. My freelance work meant that there was no cap on my overall salary as I could earn extra income freelancing.
But how do you know whether it is a good idea to quite the 9-to-5 and go fully freelance? My main reasons were:
But when do you know that you are ready to go freelance full-time? For me it was when:
And some of the steps I took were:
Since working freelance the benefits have outweighed any negatives. For many people, (those inputting information into a computer whether it be words, numbers or 3D information), work can be done flexibly and from home or a small office/studio. I’ve experienced a range of lifestyle changes since working from home:
Overall I would say that if you want more flexibility in life or other improved conditions, you may want to chat to your employer first. However, if there is no movement or compromise, you may want to try freelance work - as long as you’ve built up a safety net. I never want to go back... |
AuthorWhat am I doing here? I'm collecting sea water to fill 1,000 bottles and hang them from a scaffold inside an old ruin. Why? Why not? Archives
December 2023
Categories
All

|
 RSS Feed
Proudly powered by Weebly